Archive for the ‘Archived’ Category
Cribbage Boards
So this was a fun project! I decided a fun way to play with epoxy and do something useful was to make some live edge and epoxy cribbage boards. I ordered the Rockler templates for drilling and got both the large and small 3-track templates. The first thing I wanted to try was using the template. I snagged a small leftover piece of ambrosia stained tiger maple and put the template to work. Below is the result:
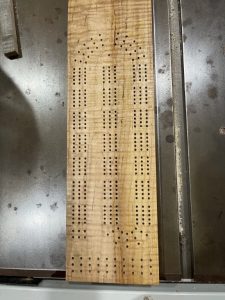
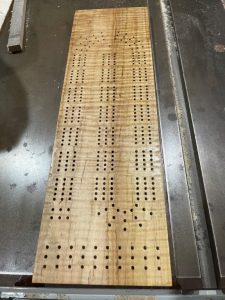
I was happy with the results and was confident the templates would provide a nice clean cribbage layout. On to the epoxy!
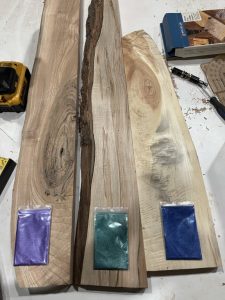
Step 1 was to choose some good live edge pieces for the boards.


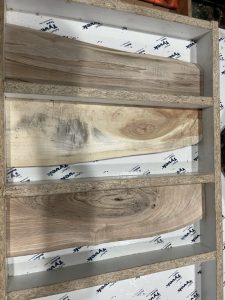
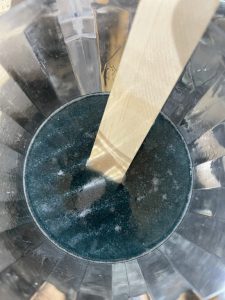
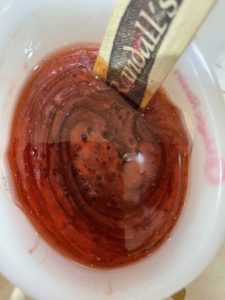
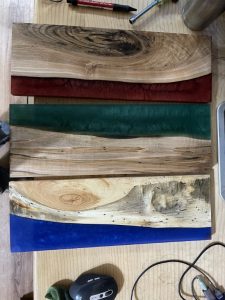
Next was to build a mold for the boards and the epoxy, and to choose the epoxy colours. I built the mold using leftover melamine and then coated the bottom in Tyvek tape. I’m happy to report that release the epoxy from the molds went pretty well. Initially I chose the green, blue and purple. Later on I decided to swap in the red in place of the purple.
Mixing and pouring the epoxy… A word of warning – your wood *will* float in the epoxy if you don’t hold it down. Since epoxy isn’t cheap, I deliberately calculated the amount of epoxy needed per mold pretty tightly. Too tightly it would appear. I was a little short on the blue and red forcing me to plane those pieces a little more than I had planned.

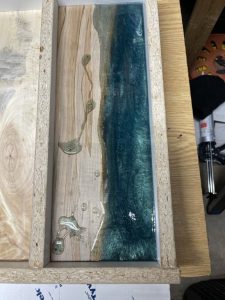


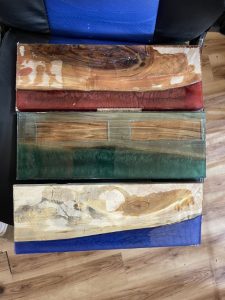
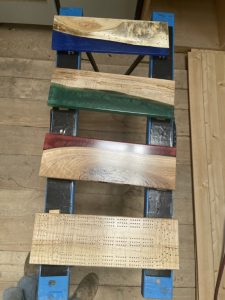
As noted – releasing the boards from the mold didn’t go too badly. The best approach seemed to be wedging a putty knife under them and prying upwards. Below are the boards after they were released from the mold. These are the steps I followed to create a finished board:
- Flatten the boards on one side and one edge using the jointer
- Cut them to the desired width using the table saw
- Plane them on the other face until the wood and epoxy are flush with each other
- Cross cut the boards to the desired length
- Sand the faces through all of the following grits: 60, 80, 100, 120, 150, 180, 240, 320, 400, 600
- Apply edge treatment to the boards (I used a simple roundover)
- Re-sand the faces after messing them up applying edge treatments
- Apply a clearcoat to all sides of the boards. Out of convenience, I went with a water borne polyurethane and applied it using an HVLP sprayer
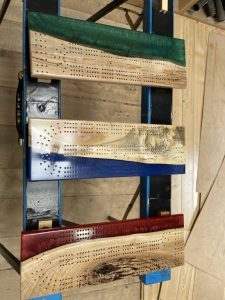
- Use the templates and drill all of the cribbage peg holes
- Look at the results in disgust, re-sand the faces to fix the imperfections the drilling process introduced, and apply another layer of clear coat to finish off the sanding…

Maple & Cherry Table
This is one of the first projects where I kept a more detailed set of pictures throughout the entire process. Going forward, I plan to have the “story” for each project for at least part of the journey from tree to timber to treasure.
Step 1 was wood selection. By sheer luck – we had milled some tiger maple from the property. The tiger maple also had some ambrosia beetle staining in places and some rose tinting. As such, I decided to pair it up with some black cherry wood which was also milled from the property. Below are the rough cut pieces. I planed a small portion and treated with mineral spirits to see the grain.
Next I made the basic frame of the table top. I made this out of the tiger maple using 2″ thick pieces. In the pics below I dropped in some loose pieces of the dressed cherry wood to see the overall effect.
Legs were made next by gluing together a stack of 1x4s using the same maple – from the same tree – to make 4×4 legs. Edge treatment is a simple roundover.
Time to glue up the black cherry center panels, square them up and do a test fit. After the test fit – the panels were glued together with the frame using biscuit joints.
Table skirt, and corner braces…
And attach the legs…
For the top I wanted to dress up the corners a little bit and provide a method to hold the miter joint tight. I opted for making a face key with coutersunk screws and wooden plugs. The face key carries on the alternating cherry \ maple theme. The face key is cherry and the wooden plugs are maple.
First step was to router out the table top to accept the face keys and clean them up with a couple of dado planes.
Then the corner pieces were checked for fit before gluing, screwing and plugging.
And finally – the finished product. I didn’t want anything to obscure the natural beauty of the tiger maple and cherry and their glorious imperfections. I opted to go with a completely clear finish and used Saman Extreme. I’m quite happy with the finish and would definitely use it again.


Wood Caddy
This has got to be one of the simplest projects I’ve ever made – essentially a box on wheels… But I absolutely love the grain patterns in these pieces. Built for my parents cottage to easily bring wood inside to the woodstove. Roll it to the door – load it up – roll it back to the woodstove by pulling the rope handle.


RV Table
This was a fun project. This was created for my parent’s RV – to replace the rather plain arborite table and was made with oak to complement the cabinets in the RV. There is a leaf extension that fits down inside the frame for storage. When in use – the leaf locks to the rest of the table and the wall bracket.


Linen Cupboard
This was built for a friend out of reclaimed – and very very rough – barn boards. The boards were in terrible shape and I wasn’t sure I’d be able to salvage enough wood to actually build a cabinet. This project required the purchase and use of a metal detector to extract all of the old nails. The old nails left beautiful blackened holes in the wood enhancing the rustic look of the cabinet. Pieces that were splitting were ripped down the length of the split and dressed to make smaller boards. After planing off the weathered surface, the grain, knots and nail / bug holes really looked nice. Some of the narrower resulting boards were shaped on the router table to form a tongue and groove solid wood backing.


Media Cabinet
A work colleague and friend commissioned me to build him a custom media cabinet. The wood here is Black Ash. The back of the cabinet is 1/4″ Birch plywood and the drawer carcass is made from 3/4″ particle core melamine. It was delivered with open frame doors and later finished with the wavy glass seen below.


Filing Cabinet
If I recall correctly – this is the first project I made using lumber that was milled from our property. The wood is Black Ash – or Swamp Ash. I deliberately chose pieces that had a mixture of heart wood (dark) and sap wood (light). I treated the cabinet with wipe on poly (50% polyurethane, 50% mineral spirits). Over time the dual colour of the wood has melded together and the cabinet is more of a uniform golden colour. I have to say that I really do like working with Ash and the grain pattern. I find that the grain is similar looking to Oak, but not porous the way that oak is.


